
# Introduction
This guide will walk you through the steps to get started with accessing Hapag-Lloyd’s internal systems and utilizing our comprehensive portfolio of Products and APIs within the shipping industry. By following these instructions, you'll be able to seamlessly integrate real-time shipping information into your software applications.
# Step 1: Registration
To begin your journey with the Hapag-Lloyd API Developer Portal, you first need to create an account. This registration is essential to access the platform’s features and ensures a personalized experience. Follow these steps to create your account:
- Visit the API Developer Portal website (opens new window).
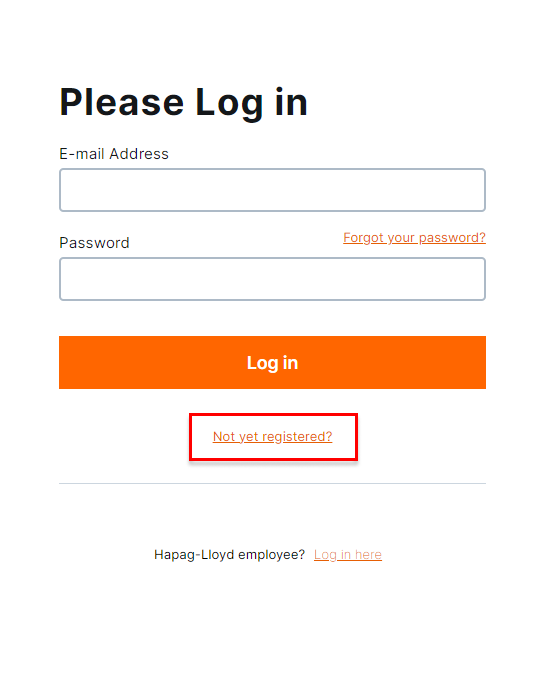
- Click on the "Login" button and select 'Not yet registered?'.
- Fill in the required details (Name, Last name, Phone number, Company name, Address, City, Postal code, and Country).
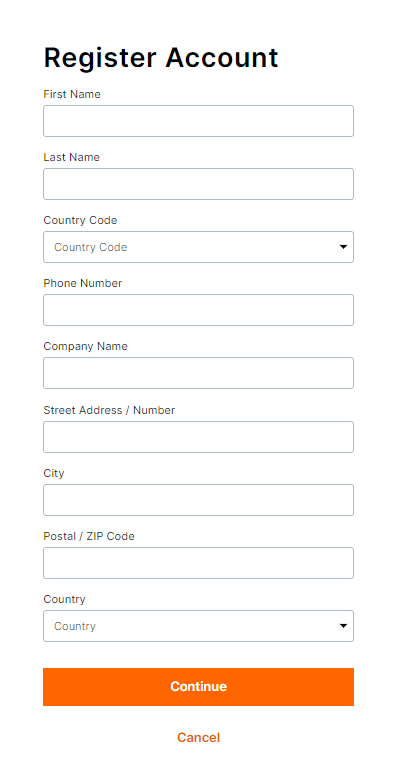
- Click 'Continue'.
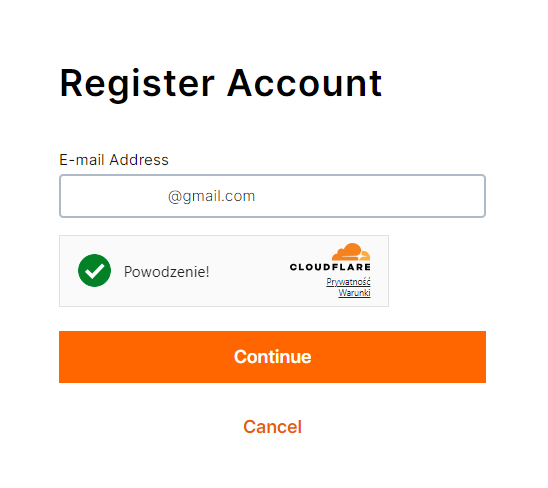
- Enter your e-mail address and click 'Continue' again.
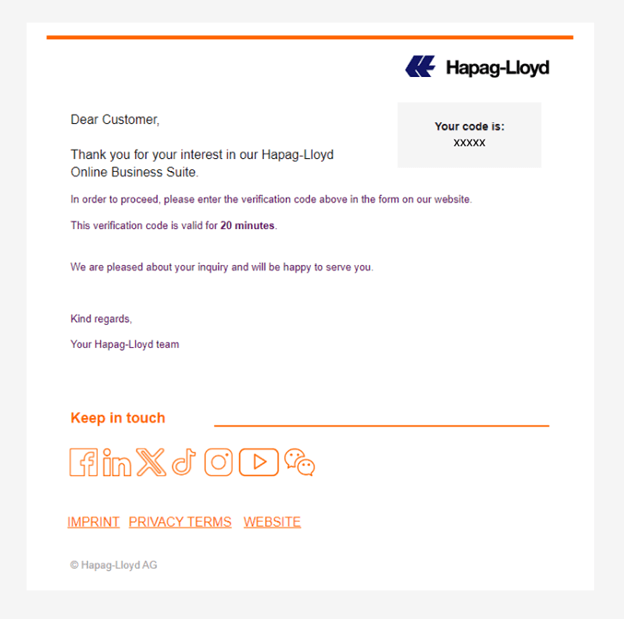
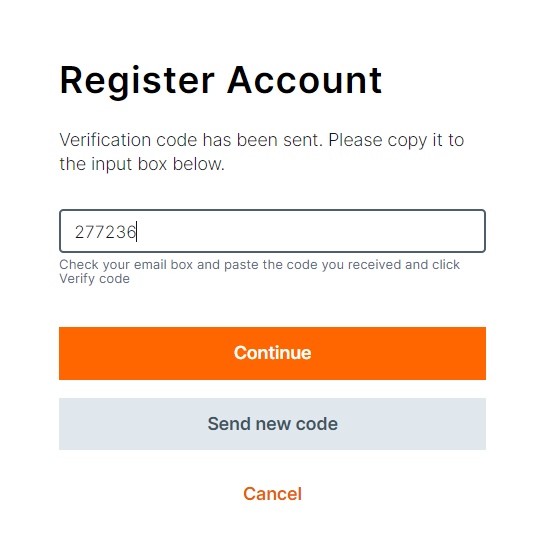
- Check your mailbox for an e-mail with verification code, copy it, and enter it in the form. Click 'Continue'.
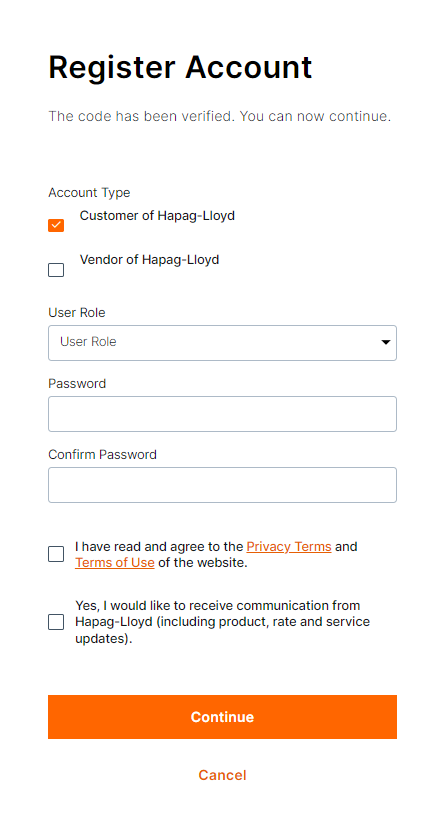
- Select your user role, set a password, and confirm it. To complete the registration, agree to the Privacy Terms and Terms of Use. You may also opt into Hapag-Lloyd communications.
- Once registered, your account will be verified by Hapag-Lloyd. After verification, you'll receive an email confirmation granting you access to additional features like application creation and API subscription requests.
# Step 2: Create an Application
To access APIs and obtain your individual API credentials (ClientID and Client Secret), you must create an application. This application acts as the interface between your software and our APIs. Note that these functionalities will only be available after your account has been verified and granted permission.
# Authorization Code Application (Portals / 3rd Parties)
Follow these steps for creating an Authorization Code-type application:
- Log in to your API Developer Portal account.
- Navigate to the "Applications" section.
- Click "Create New Application".
- Select "Authorization Code" and choose between “Web Application” or “Single Page Application (SPA)”, then provide the necessary details.
- Submit the form. Your application request will be processed by Hapag-Lloyd experts, and the status will be marked as pending.
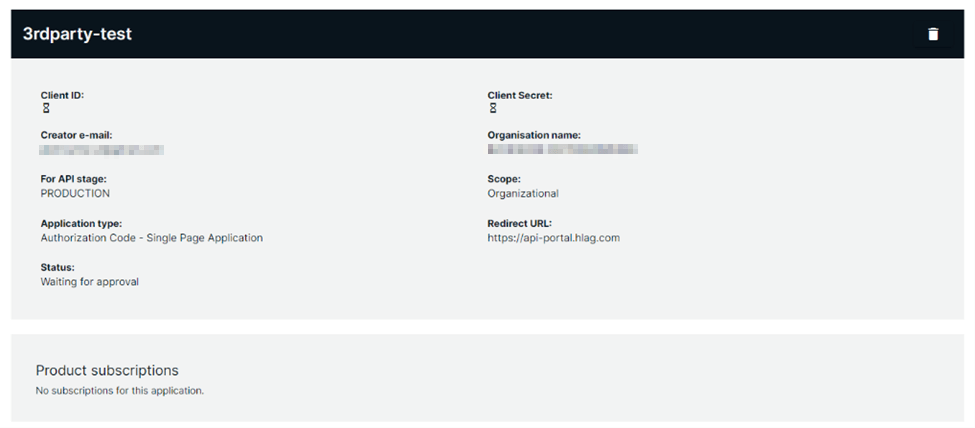
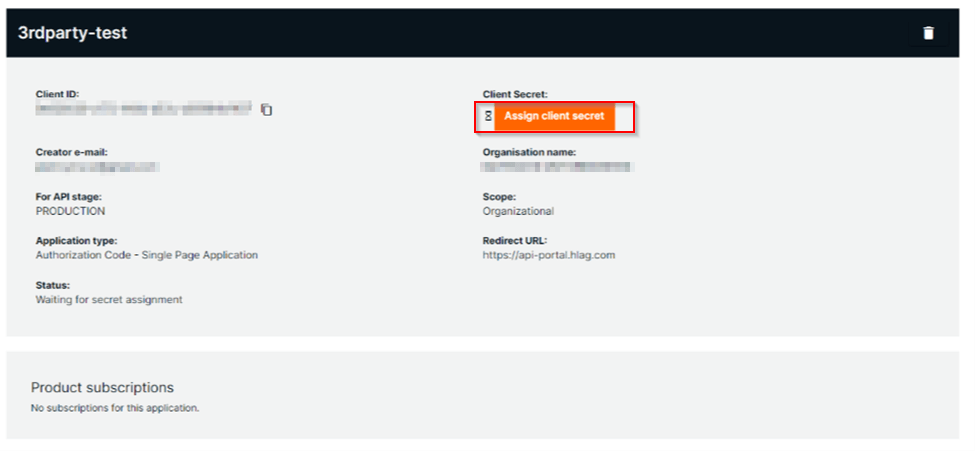
- After approval (which may take up to a week), assign your Client-Secret to the application by clicking the “Assign client secret” button.

- You’ll now have unique API credentials (Client-ID and Client-Secret) for authenticating your API requests.
(*Note: The Client-Secret is only shown once, so save it securely.)
# Client Credentials Application
For creating a Client Credentials-type application:
- Log in to the API Developer Portal.
- Go to "Applications" and click "Create New Application".
- Select "Client Credentials".
- Provide a meaningful name for your application and a valid organizational email address for the Technical API user.
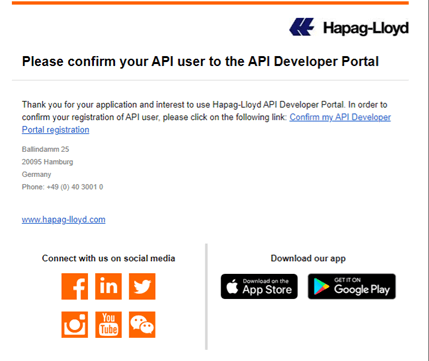
- Submit the form. A confirmation link will be sent to the provided email. Use this link to activate your Technical API User.
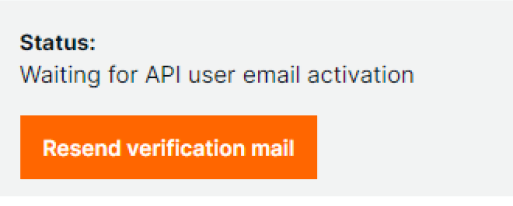
- If issues arise with the confirmation link, go to “Applications” and click “Resend verification mail”.
- Upon successful confirmation, assign your Client-Secret to the application.
- You’ll now have a Client-ID and Client-Secret for API access.
(*Note: Confirmation links are valid for 1 hour and limited to 3 retries. Save your Client-Secret, as it will only be displayed once.)
# Step 3: Subscriptions
Subscriptions establish a connection between your application and an API Product, defining your usage plan (rate limits). For access to portal functionalities, you must submit and receive approval for a subscription request. Here’s how to set one up:
- On the main page, choose an API Product by clicking an individual tile or selecting a product from the “API Products” menu.
- In the product details, click “Create new subscription”.
(This option will only appear after account verification.) - Choose an existing application or create a new one for the subscription.
- Select a usage plan/rate limit that matches your needs.
- Review the request summary and click “Submit”.
# Step 4: Subscription Approval
After submitting your subscription request:
- Hapag-Lloyd will review the request.
- You'll receive a notification about the status.
- If approved, you can use all the APIs associated with the subscribed product using your application’s credentials.
- If rejected, you'll receive a detailed explanation.
# Step 5: Accessing the APIs
Once your subscription is approved, you can begin using the APIs. Include the following headers in each API request using the credentials from your created application:
- X-IBM-Client-ID: %YOUR_CLIENT_ID%
- X-IBM-Client-Secret: %YOUR_CLIENT_SECRET%
These headers ensure proper API request authentication. Here’s an example of a request:
# Example request:
curl -X PUT
-H 'Accept: application/json'
-H "Content-Type: application/json"
-H "X-IBM-Client-ID: %YOUR_CLIENT_ID%"
-H "X-IBM-Client-Secret: %YOUR_CLIENT_SECRET%"
"https://api.hlag.com/hlag/prod-public/v1/transport-work-orders/{work_order_number}/actual-arrivals"
Replace %YOUR_CLIENT_ID% and %YOUR_CLIENT_SECRET% with your actual Client-ID and Client-Secret from created application, this ensures a secure and authenticated connection to our API endpoint.
# Step 6*: Onboarding your API Users for Authorization Code Type Application (Portals / 3rd Parties)
If you're using an Authorization Code-type application, your users must complete the registration process successfully with Hapag-Lloyd. Guide them through Step: 1 Registration to ensure proper access.
That's it! You have now completed the Getting Started guide for the Hapag-Lloyd API Developer Portal. We hope this guide has helped you on your journey to harness the power of real-time shipping information and integrate it seamlessly into your software applications.
If you have any questions or need assistance, do not hesitate to reach out to our support team. Happy coding!